Four Easy Ways to Preserve the Harvest
Preserving the harvest doesn't have to be time-consuming or complicated. Now that the harvest season is here, it's time to stock up for winter. Try these simple methods to enjoy your garden's bounty all year long.
Pickling
Pickling is a great way to preserve vegetables. As long as you follow a tested recipe, the acidic vinegar protects against harmful bacteria. Besides, pickles just taste great! Even if you don'tplan to can your pickles, the brine will keep them fresh and crisp in your fridge for up to a month.
A lot of people associate pickles with cucumbers, but all sorts of vegetables can be pickled. Whether you're harvesting your summer-planted beets and carrots now, or planting fresh ones to harvest next spring, here are two delicious recipes for these under-appreciated cool-season veggies.
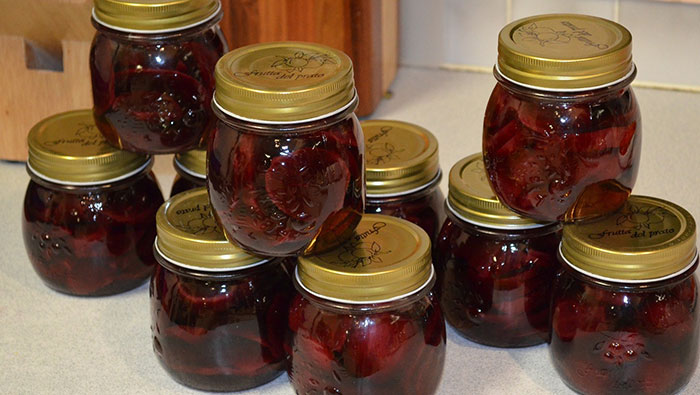
Pickled beets
2 pounds beets
1 cup white vinegar
1/2 cup white sugar
½ tablespoon pickling salt
Recommended spices: 1 tablespoon cumin seed and ¼ teaspoon whole cloves, or ¼ cup fresh dill and 1 tablespoon dill seed.
- Boil or roast the beets until tender, remove skins, and cut into slices that are ¼ inch thick.
- Bring the vinegar, sugar, and salt to a boil in a non-reactive saucepan, stirring to dissolve the sugar and salt. Remove from heat.
- Pack the beet slices and spices into jars, leaving 1 inch of headroom. Pour the hot brine over the beets to cover by ½ inch. Add lids.
- Refrigerate for up to three weeks, or can by processing in a boiling water bath for 30 minutes. (Before jumping into home canning, learn more about about it here.)
Pickled carrots
1 ½ pounds carrots
1 cup white vinegar
1 cup water
1 tablespoon pickling salt
Recommended spices: dill seed, fresh dill, peppercorns, and garlic
- Cut the carrots into sticks that will fit in your jars, then drop them into boiling water to tenderize them. Boil for 90 seconds if you plan to can your pickles, or 3 minutes if you plan to refrigerate them. Drain and run under cold water to stop cooking.
- Bring the vinegar, water, and salt to a boil and stir to dissolve the salt. Remove from heat.
- Pack carrots and spices in jars, with the carrot sticks packed vertically, leaving 1 inch of headroom. Pour the hot brine over the carrots to cover by ½ inch. Add lids.
- Refrigerate for up to 3 weeks or can by processing in a hot water bath for 10 minutes.
Fermentation
Fermentation is one of the oldest food preservation methods in the book. And the results are both tasty and extremely beneficial to your health. Classic sauerkraut is a great and easy place to start.
Sauerkraut
1 large cabbage
5 tablespoons kosher salt
Recommended spices: juniper berries or caraway seed
- Remove outer leaves, then quarter, core, and shred cabbage. Mix thoroughly with the salt and any spices in a nonreactive bowl.
- Transfer the salted cabbage to a 1 gallon glass or ceramic container, press down, and cover with a plate that just fits inside the opening of the jar. Weight the plate down using a jar filled with water.
- Check after 24 hours to make sure that all of the cabbage is submerged in liquid. If not, top off with a solution of 1 tablespoon salt to 1 cup of water.
- Check the kraut daily. Make sure the cabbage stays covered with brine, for safety reasons. Your sauerkraut is done when bubbles stop forming, typically in about 1-2 weeks. Move to the refrigerator and store for up to a month.
Drying
Many gardeners want to grow their own herbs, but have trouble using them fast enough while they're fresh. The good news is that drying herbs at home couldn't be easier.
Fall is the perfect time to harvest herbs for drying. Just make sure to cut back perennial herbs like sage or thyme by no more than 1/3 of the plant each year. Here's a basic drying method that works with almost any kind of herb.
Dried herbs
- Clip herb stems as long as you can. Wash if needed, and dry well.
- Tie the stems together at the cut end, then hang in any place that is dry and has good air circulation. Sheds and attics often work well.
- Once the greens are crumbly, you can transfer your dried herbs to jars for storage.

Freezing
Freezing fresh herbs is simple, but requires different methods than when preserving fruits and vegetables. Here are two ways to freeze your fresh garden herbs to use any time of the year.
Herbal ice cubes
- Wash herbs and remove any woody stems.
- Puree the leaves with an equal amount of water by volume.
- Pour the mixture into an ice-cube tray, and freeze.
- To use, add these herbal ice cubes directly to whatever you are cooking.
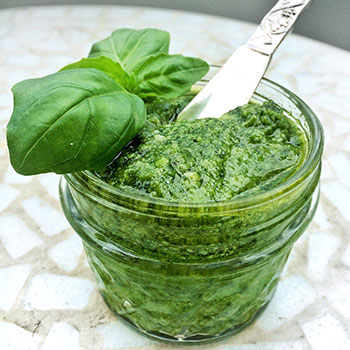
All-herb pesto
 1 cup olive oil
1 garlic clove
½-1 cup cheese
¼-½ cup nuts
2 cups fresh herb leaves
Salt to taste
- Pour the oil into a blender. With the motor running, add the garlic, cheese, and pine nuts and process until smooth.
- Add the herbs and process again, then add salt to taste.
- Eat fresh, or freeze in an ice cube tray.
Of course, classic pesto is made with basil, Parmesan, and pine nuts, but why stop there? Cilantro, parsley, sage, and other herbs also make great bases for pesto. Try feta cheese or queso fresco instead of Parmesan, and almonds instead of pine nuts too!